|
|
|
8 (800) 700 7672 Free in Russia |

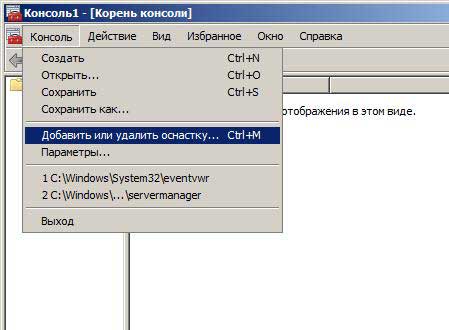
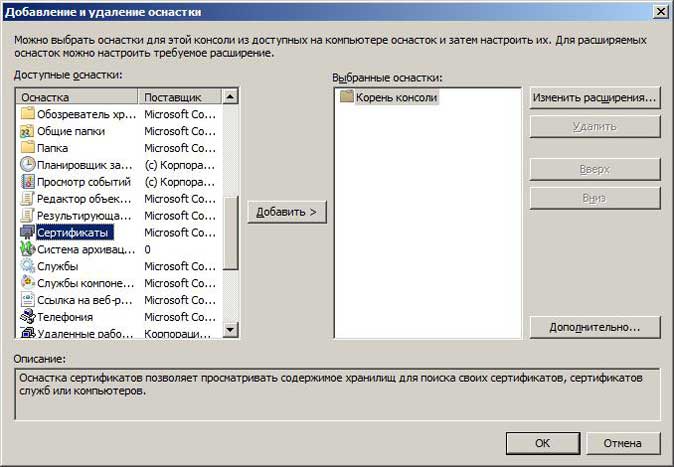
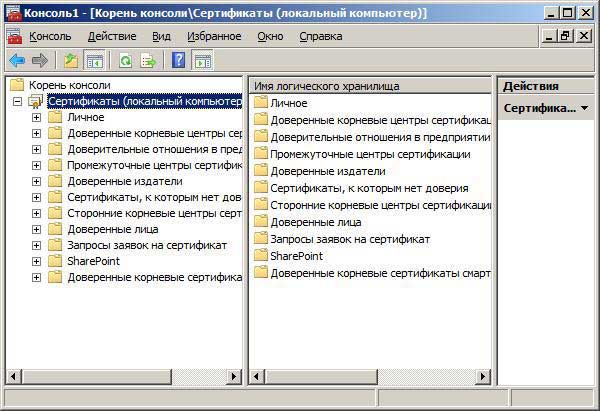
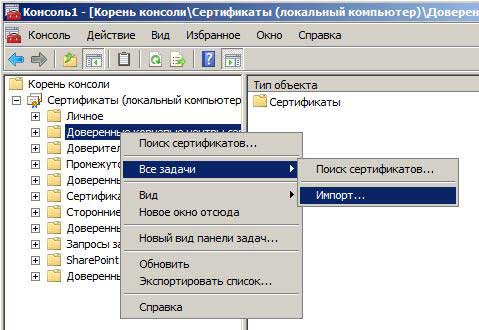
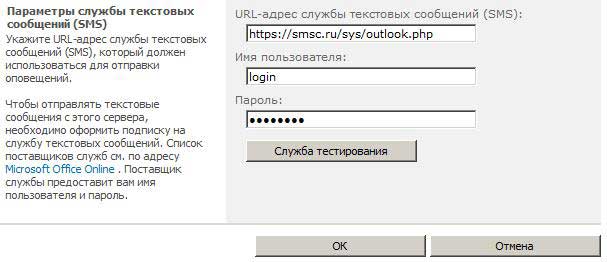
OMS Protocol (MS Outlook and MS SharePoint)Protocol DescriptionMicrosoft Office Mobile Service (OMS) is a messaging component developed for Microsoft Outlook and Microsoft SharePoint starting with version 2007. Using OMS users can easily integrate the mobile capabilities of Outlook and SharePoint with their mobile devices.With the mobile messaging features provided by OMS, users can perform tasks such as creating text messages in Outlook, forwarding Outlook items (including email messages, meetings, and contacts) as text messages, receiving alerts from SharePoint to mobile phones, and extending the messaging capabilities in Outlook and SharePoint OMS using the object model. In addition, with the item redirection features, users can not only create and send text messages in Outlook, but also automatically redirect reminders, emails, and the next day's schedule to the mobile phone with simple conditions. Users can also send email messages, meetings, and meeting invitations to mobile phones.. The OMS protocol settings are built into the Outlook account settings, which provides an effective integration that allows users to manage mobile message accounts in parallel with email accounts. Mobile phone numbers are treated as a kind of address, and users can add recipients to mobile messages using the auto-complete feature or by selecting names directly from the Outlook address book. Users can also save and manage mobile messages in Outlook folders. The OMS client embedded in Outlook and SharePoint sends text messages to a web service created and hosted by partners that are mobile carriers or mobile messaging service providers. The web service then delivers the message to the mobile carrier's text or mobile message center. In SharePoint, the user can receive text alerts (in the form of SMS messages) via OMS. The user can receive notifications about the status of SharePoint documents or lists, text messages about any changes, and, if necessary, the URLs of documents or lists.. A detailed description of the OMS protocol can be found at this link. Configuring MS OutlookSetting up an MS Outlook AccountStarting with the Microsoft Outlook 2007 version, users of this software product have the opportunity to send SMS messages through various services and mobile operators, including through our service.Since Microsoft Outlook 2013, the SMS sending service (Outlook Mobile Service) is not supported, this service is available in SharePoint. To set up an MS Outlook account, you can use the following description (here is an example of a configuration for MS Outlook 2010).On the File tab, selectAdding an Account. 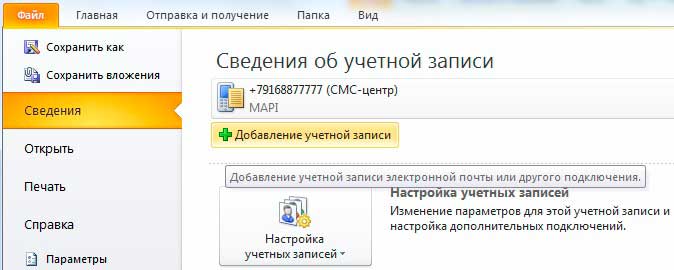 In the dialog box that opens, selectExchange text messages (SMS) and tapFurther. 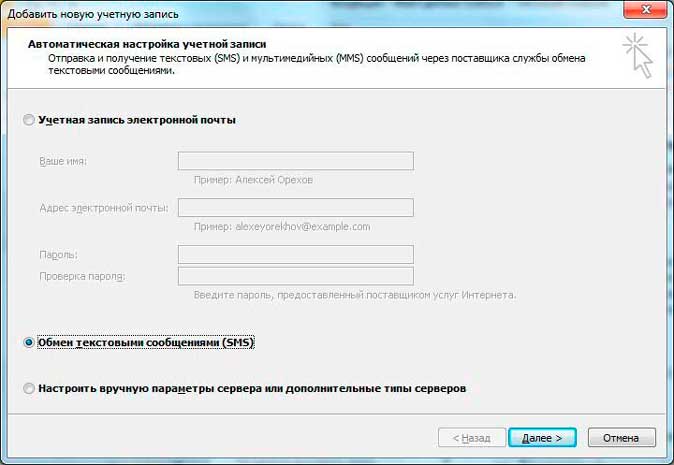 In the Outlook Mobile Service Account dialog box, enter the https://smscentre.com/sys/outlook.php address in the operator URL field, in the User field - login, and in the Password field - the password received during registration.  After entering the required data, click OK and then clickDone. Sending a message to MS OutlookTo send a message on the tabHome in the groupCreate click the buttonNew items and select the item Text message (SMS).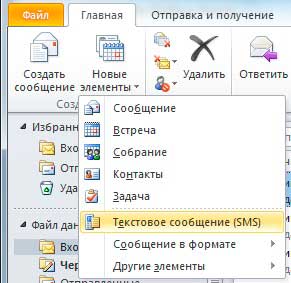 In the windowA text message in the To field... enter a comma-separated or semicolon-separated list of message recipient numbers , or select recipients from the MS Outlook address book by clicking To... orAddress book. Then, in the message input field , enter the desired SMS text. When entering text on the left in the windowPreview displays the message text in the form in which it will be sent to the recipients. After you have finished editing the text to send the message, clickSend. 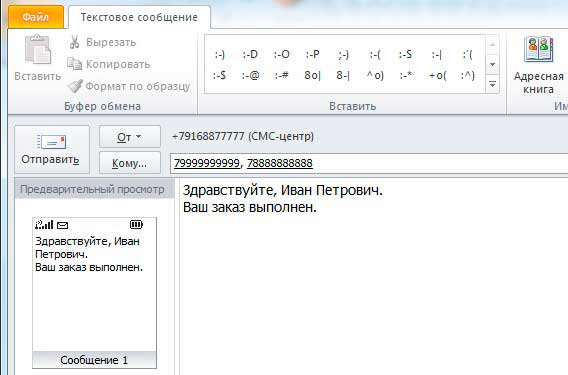 To send messages from your own number or the letter name of the sender, set the desired option as the sender's name (Sender ID) by default in your personal account under "Settings". Forwarding MS Outlook itemsUsing the functions provided by the OMS protocol, users can organize the forwarding of various MS Outlook items, such as daily summaries, mobile reminders and notifications, invitations to meetings or meetings, contact cards and other tasks, in the form of text messages to mobile phones.To set up sending mobile reminders, notifications, or daily summaries to your phones, follow these steps: Open the File tab and select the itemParameters. In the window that opens, selectMobilephones . Next, select the notification type, configure the required conditions for executing the notification, and save the changes. 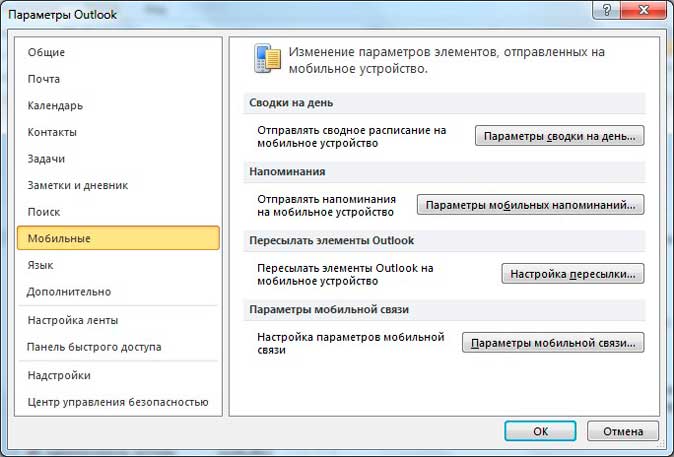 To configure sending invitations to meetings or meetings as text messages, create the appropriate element by clicking in the tabHome buttonNew items and selecting the desired item. Fill in all the required fields. In the fieldFrom select the account that is intended for sending SMS messages through our service. In the To field... list the mobile numbers of the recipients of the message, or select the appropriate contacts from the address book by clicking the To button.... Check that the data and recipient numbers you entered are correct, and then clickSend. 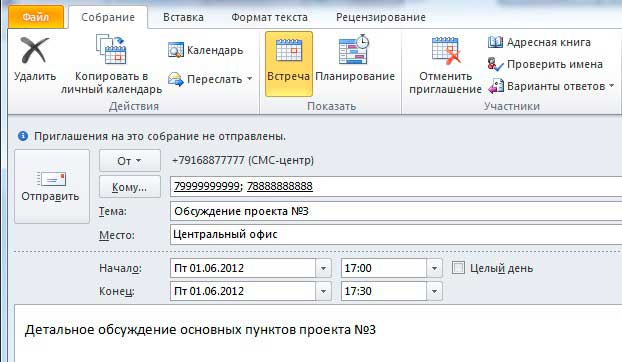 To forward an MS Outlook contact card via SMS, select the contact card you want to forward in your Outlook personal address book. Then in the tabContact click the buttonForward and selectForward as a text message. In the window that opens, send a message in the To field... enter the recipient numbers of the message or select the appropriate contacts from the address book. 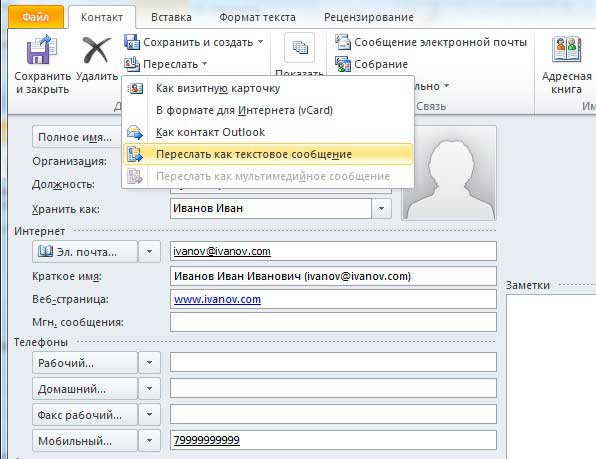 Configuring MS SharePointInstalling certificates in MS SharePointBefore setting up an MS SharePoint account, you need to install the certificates (root, intermediate and non-root) to the trusted root certificate authorities of the local computer and to the partitionManaging Trust Relationships in MS SharePoint.Adding Certificates to Trusted Root Certificate AuthoritiesEach certificate must be imported to the trusted root certificate authorities of the local computer on each of the farm servers. To do this, follow these steps::
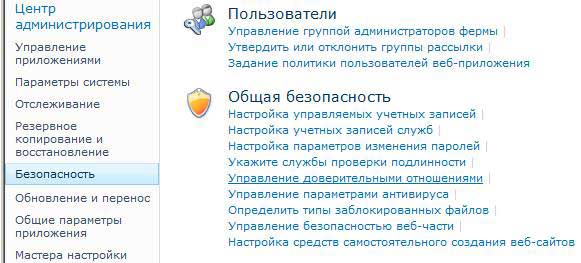
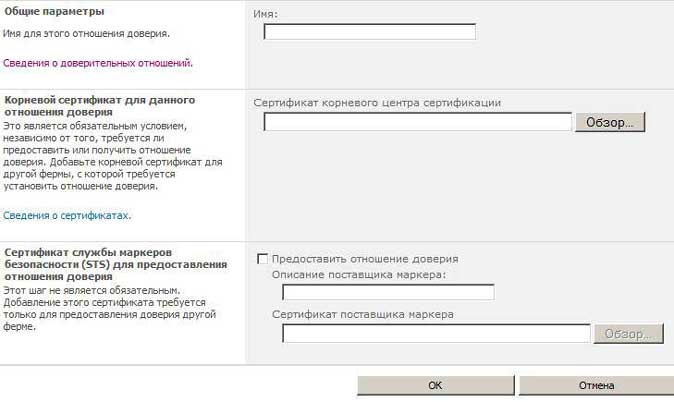
Adding Certificates to MS SharePointAfter the certificates are installed on the local computer, you need to add them to the sectionManage trust relationships in SharePoint. You only need to do this on a single server, because the trust relationship operates across the entire farm. To add certificates to the sectionManaging a trust relationship you need to do the following steps:
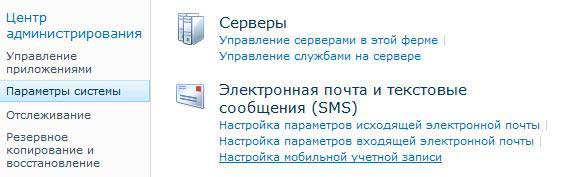
On the SharePoint front-end web server, run the IISReset command. To do this:
Setting up an MS SharePoint AccountTo set up an MS SharePoint account, you can use the following description (here is an example of a configuration for MS SharePoint 2010).
|